


A lovely Mummy in my Mums group and I were chatting last week about wanting to make taggie teething blankets for our daughters. After our conversation we were both inspired to go to Spotlight and Lincraft to stock up on pretty different textured fabrics to make our projects!
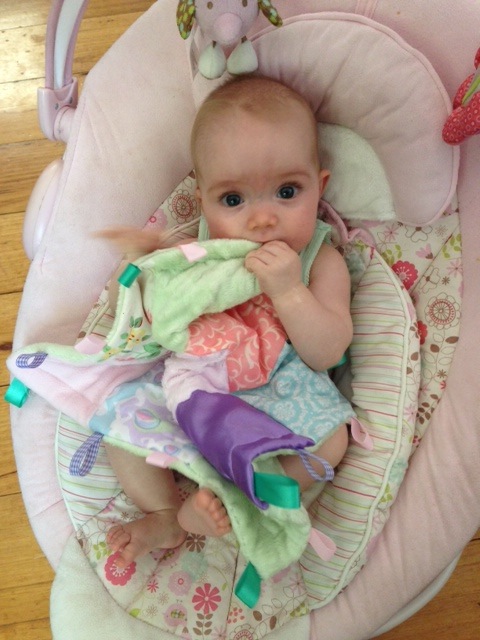
 These blankeys can be a comforter, teether, play toy, they can be nice and snuggly like a blankey but also have stimulating additions to keep bubs entertained.


I have NO idea how Jo's going to make hers, and I am so excited to have show and tell at mothers group today!!
Collect your fabrics- I made sure I had a combination of different colours and textures, as well as a lovely and soft backing as I knew it was going the be the main feature of this blanket. For the backing I used the bubble minky fabric (picture here in pink and green at the bottom.) I found these at Lincraft. I also used purple satin too but it's not in the picture.

I cut my fabrics into 5.5"x5.5" pieces then arranged them to look like this. I doubled up on a few of the minky fleeces as they are so beautiful to touch.

I then pinned a piece of cellophane to the back of 3 different squares of fabric to create a crinkly and crunchy sound when Ava plays with her blanket.

Join all of your pieces together by attaching them in rows first then sewing the rows together. Pin the seams of the rows before sewing so you know they are going to be well aligned.


Pin your ribbons to the front of your quilt as pictured making sure they overlap slightly over the edge. This will ensure they are sewn into the seam allowance


Layer your fabrics ready to join. Make sure the blanket top and backing are right sides facing, and the batting (if desired) is behind the quilt top.
Sew around the perimeter of the blanket, leaving about 2 inches for turning out.

Turn out blanket, blind stitch the opening, then sew around the entire perimeter of the blanket
I really wanted to add a wooden teething ring, and they've been ordered-I'm just waiting on them in the post! I'll update this when I get them...


Give it to your bubby and watch them just fall in love with their new blankie!!
No comments: