Here is a quick, easy and effective little craft that takes a little bit of preparation, then no time at all to complete!
Whip up a whole bunch of these to mix and match with different outfits, or make as gifts for teachers, aunties or friends. They would even look gorgeous attached to a card. The options are endless!
All you need is-
At least 3 pretty fabrics (I used left over Moda charm squares)
a button
some felt
a brooch back
fabric stiffener (or any iron product to avoid fraying)
Here's what to do
Using fabric stiffener (available at Spotlight or Lincraft) follow the instructions as to how firm you would like your fabric. I filled a bowl with enough water to immerse 1 piece of 5"x5" fabric in and a small dollop of this product. Wring it out as much as you can, then lay it on some baking paper, or a blank clean surface, to dry.
Preferably do this in the morning of or the day before you want to finish your task.
Do this step with at least 3 different fabrics.
After you have a nice firm fabric, you can finish off your brooches!!
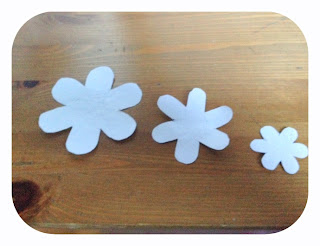
Prepare 3 different sized flowers, I used this template here and cut each size accordingly. You could make the brooches whatever size you like, mine are about 10 cm big.
Choose the fabric you want for the biggest flower, pin it to the large flower template then cut around.
Do the same for each size and colour. I found that you could fit more than 1 template on a charm square to prepare more than one brooch at a time.
Layer your 3 colours on top of each other being sure to offset each of the petals to be between the ones below (as pictured)
 |
Choose a button of a contrasting and complementary colour and sew on tho the top of the flower, sewing through all layers.
Cut out a circular piece of felt, glue it to the back and wait for it to dry. Then, glue a brooch back on top of the felt.
Note-Before gluing the brooch back on, make sure you position it in a way that you would like the brooch to appear, as well as having the brooch back the right way up. ( I made this mistake!)
Here they are!! Easy!


No comments: